

iPhone Microphone Not Working During Calls? Fix It Fast
September 18, 2026
iPhone Battery Health What’s Good, and How to Check It
September 23, 2026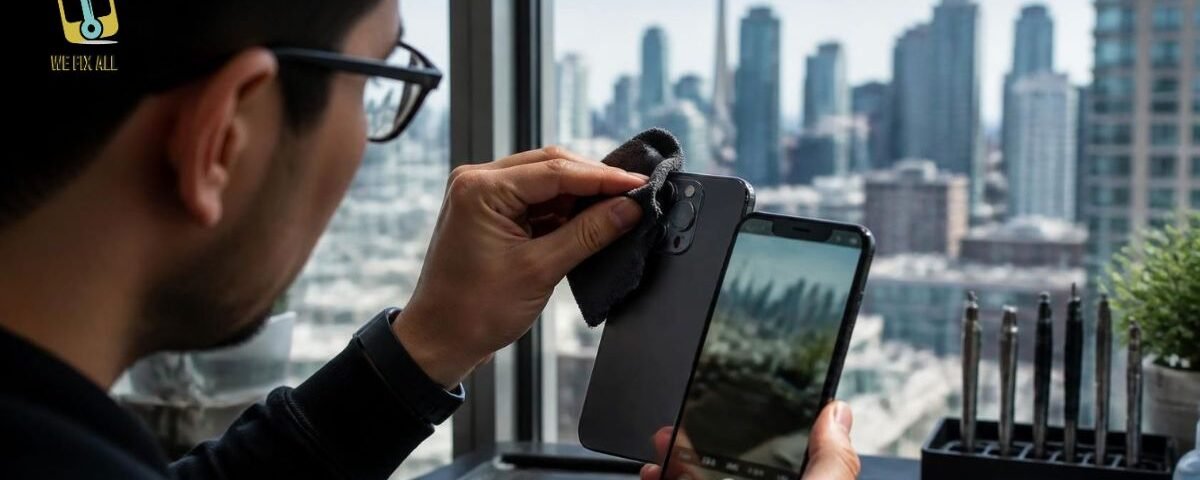
Your iPhone used to take sharp, clear photos. Now every picture looks soft, out of focus, or just… blurry. Whether you’re trying to capture your pet, scan a QR code, or snap a quick selfie, the blur is ruining the shot.
Here’s the good news: a blurry iPhone camera is usually fixable in minutes without tools or a repair shop visit. Most of the time, it’s something simple: a dirty lens, the wrong focus setting, or an outdated iOS version. In rare cases, it signals hardware damage that needs professional help.
Let’s walk through the fixed ladder. Start at the top and work your way down until your camera is sharp again.
What’s Causing Your Blur?
A blurry iPhone camera is usually caused by a dirty lens, outdated iOS, or manual focus set wrong. Start with these free fixes in order: clean the lens with a microfiber cloth, restart your phone, tap to focus manually, remove your phone case, and update to the latest iOS. If none of those work, check for hardware damage (scratches, liquid inside the camera, or optical image stabilization failure) and contact Apple Support or a local repair shop. Most fixes take under 5 minutes.
5 Quick Fixes to Try First (Ordered by Speed & Success Rate)
Clean the Lens (30 Seconds) 90% Success Rate
This is the #1 reason iPhone cameras blur. Dust, fingerprints, grease smudges, and lint collect on the lens glass without you even noticing.
What you need:
- A soft microfiber cloth (the kind that comes with glasses or screens)
- Nothing else avoid water, rubbing alcohol, or paper towels (they scratch)
How to do it:
- Grab the microfiber cloth
- Gently wipe the camera lens in small circular motions
- Take a test photo
That’s it. Seriously. If your photos suddenly turn sharp, you found your culprit.
Pro tip: Keep a microfiber cloth in your bag or car. Buy a multi-pack on Amazon for $5–10 CAD; they’re dirt cheap.
Restart Your iPhone (1 Minute) 60% Success Rate for Software Issues
A simple power-off and on clears temporary glitches in the Camera app and iOS that can cause focus to freeze.
How to restart:
- Press and hold the Side button + Volume Down (any iPhone model)
- Slide to power off
- Wait 10 seconds
- Press and hold the Side button again until the Apple logo appears
- Open Camera and test
If the blur was a software hiccup, you’re done.
Tap to Focus Manually (Instant) 75% Success Rate
Your iPhone’s autofocus is smart, but it’s not mind-reading. Sometimes it focuses on the wrong thing like the background instead of your face.
How to tap to focus:
- Open the Camera app
- Point at the subject you want sharp
- Tap the screen where that subject is
- Wait for the yellow focus box to appear and lock (look for “AE/AF LOCK” text)
- Take your photo
This works instantly for most out-of-focus shots. It’s the most common reason people think their camera is broken when it’s actually just focused on the wrong spot.
If focus keeps drifting: Hold your finger on the focus area for 1 second until you see AE/AF LOCK appear. This locks the focus and exposure, so the camera won’t keep refocusing.
Remove Your Phone Case (2 Minutes) 40% Success Rate
Some phone cases block the camera lens partially or cause light reflection that mimics blur. Metal or magnetic components in cases can also interfere with the autofocus mechanism.
How to test:
- Remove the case
- Take a few test photos
- If they’re sharp, your case is the problem
- Solution: Buy a case with a larger camera cutout, or use no case
This is especially common with thick, tight-fitting cases or ones with magnetic mounts.
Update to the Latest iOS (Varies, Usually 15–30 Minutes) 55% Success Rate for Software Bugs
Apple occasionally releases iOS updates that fix camera bugs. If your blur started after an iOS update (rare but documented), or if you haven’t updated in a while, a fresh version might fix it.
How to update:
- Go to Settings > General > Software Update
- If an update is available, tap Download and Install
- Plug in your charger and wait
- Test the camera when done
If the blur persists after all five fixes, move to the diagnosis section below.
Why Your Camera Is Actually Blurry (The 8 Root Causes)
If the quick fixes didn’t work, here’s what’s likely happening:
Cause #1: Dirty Lens or Scratches
What it is: Dust, fingerprints, or actual scratches on the lens glass scatter light and blur the image.
How to know: Try the microfiber cloth test (Fix #1 above). If wiping doesn’t help, the scratches are permanent.
Next step: If scratches are deep, the lens glass needs replacement (~$100–$150 CAD at a repair shop). For tiny scratches, the blur might be minimal enough to live with, or professional polishing can help.
Cause #2: Phone Case Blocking or Interfering
What it is: Cases with magnetic components, metal frames, or poor camera cutouts physically interfere with focus or block light.
How to know: Remove the case (Fix #4). If photos suddenly turn sharp, this is your problem.
Next step: Buy a case with a larger camera opening, or go case-free if you’re careful.
Cause #3: Software Glitches (Camera App or iOS)
What it is: The Camera app crashes or freezes, or an iOS update introduces a bug that breaks autofocus.
How to know: Does the blur happen in the native Camera app only, or also in other apps like Snapchat or Instagram?
Next step:
- If only in Camera app: Force-close it (swipe up in App Switcher, find Camera, swipe up on it), then reopen. Or restart your phone (Fix #2).
- If in all apps: It might be a permissions issue. Go to Settings > Camera and make sure the app is enabled in Privacy/Camera settings.
- If it started after an update: Try updating again (Fix #5), or reset all settings (see Deep Troubleshooting below).
Cause #4: Manual Focus Set Wrong (or Autofocus Disabled)
What it is: You (or someone else) tapped the screen and locked focus on something far away, or accidentally enabled manual focus mode.
How to know: Open Camera and tap on your subject. Do the photos turn sharp?
Next step: Tap the screen once to set focus on your subject, then take the photo. Or try resetting all Camera settings (see Deep Troubleshooting).
Cause #5: Optical Image Stabilization (OIS) Failure
What it is: Newer iPhones (especially iPhone 11 Pro and newer) use tiny electromagnets and gyroscopes to steady the camera as you shoot. If this mechanism breaks, you get constant blur and often a clicking sound.
How to know:
- Does the camera physically shake or rattle when you open the Camera app?
- Do you hear a clicking or grinding sound from the camera?
- Is the blur only in the main rear camera, not the ultra-wide or telephoto?
Next step: This requires a camera module replacement (~$250–$400 CAD at Apple Support or a repair shop). DIY repair is risky and voids warranty. Don’t try the “magnet fix” you might see online it can fry other phone components.
Cause #6: Third-Party App Quality Loss
What it is: Snapchat, Instagram, TikTok, and other apps compress video or capture at lower resolution to save bandwidth. The Camera app looks perfect, but the third-party app looks blurry.
How to know: Open the native Camera app and take a photo. Sharp? Now open Snapchat or Instagram and take the same photo. Blurry?
Next step: This isn’t a broken camera, it’s the app being stingy with quality. Workaround: Take photos in the Camera app, then post them to social media. They’ll look much better.
Cause #7: Liquid Damage or Condensation
What it is: Water or moisture inside the camera lens fogs the image. In Canada, condensation is common when you go from a cold car into a warm house.
How to know: Look closely at the camera lens. Do you see tiny water droplets inside the glass?
Next step:
- For condensation: Turn off your phone, leave it in a warm, dry place for 24–48 hours (don’t use rice that’s a myth). The moisture should evaporate.
- For liquid damage: Stop using the phone immediately. The moisture can corrode internal circuits. Take it to Apple Support or a repair shop for professional assessment. Liquid damage often requires a camera module or motherboard replacement ($300–$500+ CAD).
Cause #8: Faulty Camera Module or Sensor
What it is: The actual camera hardware is defective or damaged from a drop, impact, or manufacturing flaw.
How to know:
- Does only one camera look blurry (e.g., the telephoto is sharp, but the main is blurry)?
- Did the blur happen after a drop or impact?
- Have you tried all the fixes above with no luck?
Next step: The camera module likely needs replacement. This requires professional service. Visit Apple Support (apple.com/support/locations, Canada) or an authorized repair partner. Cost: $200–$400 CAD depending on your model.
Photography Techniques That Actually Help (Original Angle)
Your camera isn’t just about hardware—it’s also about technique. Even a perfect camera can produce blurry photos if you’re not using it right.
Master Focus Lock (AE/AF Lock) for Sharp Photos
When your subject is moving or when you want to keep focus locked while composing use AE/AF Lock.
How it works:
- Open Camera
- Tap and hold on your subject until the yellow AE/AF LOCK label appears
- Now the camera won’t refocus, no matter what moves in or out of frame
- Compose your shot and take it
This is a game-changer for action shots or when you’re shooting in a crowded space.
Improve Focus in Low Light (Pro Tips)
Low-light scenes make autofocus struggle because there’s less contrast for the camera to lock onto.
What works:
- Tap to focus on a lighter area of your subject (a face is better than a dark sweater)
- Use your phone’s flashlight as a focus assist (point it at your subject briefly before shooting)
- Switch to Portrait mode (it uses computational focus, not just autofocus)
- Avoid zooming digital zoom + low light = blur city
When Camera Shake Masquerades as Blur
Sometimes your photos are blurry because you’re moving, not because the camera is broken.
How to fix:
- Hold the phone steady: Tuck your elbows against your ribs
- Use a tripod or prop: Lean against a wall, rest the phone on a book
- Use burst mode: Hold the shutter button down for 3 seconds to capture 10+ photos. One will usually be sharp.
- Increase light: Better lighting = faster shutter speed = less motion blur
Deep Troubleshooting (When Quick Fixes Fail)
If you’ve tried all the quick fixes and your camera is still blurry, try these nuclear options.
Reset All Settings (Doesn’t Delete Data)
This clears any weird configuration that might be stuck.
How to do it:
- Go to Settings > General > Transfer or Reset
- Tap Reset
- Choose Reset All Settings (NOT Erase All Content—that deletes everything)
- Enter your passcode
- Wait 1–2 minutes
- Test the camera
Expected outcome: This fixes software-level issues without losing your photos or data.
Force-Close and Reopen the Camera App
Apps crash. A force-close often fixes it.
How to do it:
- Swipe up from the bottom (iPhone X and newer) or double-tap Home (iPhone 8 and earlier) to open App Switcher
- Find Camera and swipe up on it to close it
- Wait 10 seconds
- Reopen Camera from the home screen
Check Third-Party App Permissions
If blur only happens in certain apps, permissions might be the issue.
How to check:
- Go to Settings > [App Name] > Camera
- Make sure Camera is toggled ON
- Return to the app and test
Do a Full iOS Restore (Last Software Resort)
This wipes iOS and reinstalls a fresh copy. Use this only if nothing else works.
Before you do this:
- Back up everything to iCloud or your computer
- Plug into power
- This takes 30–60 minutes
How to restore:
- Go to Settings > General > Transfer or Reset > Reset > Erase All Content and Settings
- Follow the prompts
- Set up your phone as new
- Test the camera before restoring your backup
- If it works, restore your backup
If the camera is sharp after a full restore, the blur was software-based. If it’s still blurry, the problem is hardware.
Is It Hardware Damage? What to Check
Before you visit a repair shop, do a visual inspection.
Condensation or Moisture Inside the Lens
Look at the camera lens. Do you see tiny water droplets, fog, or haze inside the glass?
Next step: This requires professional disassembly and cleaning, or camera module replacement. Visit Apple Support.
Visible Cracks on Lens Glass
Is the lens glass cracked or chipped?
Next step: The glass needs replacement (~$100–$150 CAD). Some repair shops can do this without replacing the entire camera module.
Blurry Spot or Vignetting (Dark Corners)
Do you see a dark spot or shadowy vignetting in one corner of the photo, no matter what you shoot?
Next step: This suggests internal dust or sensor damage. Requires professional cleaning or camera module replacement.
Camera Rattles or Makes Clicking Sounds
Does the camera physically shake or make a clicking sound when you use it?
Next step: Optical image stabilization failure. This requires a camera module replacement (~$250–$400 CAD).
Repair Pathways in Canada
If your camera needs professional help, here are your options.
Apple Support & AppleCare+
Cost:
- Camera repair (no AppleCare+): $199–$349 CAD depending on model
- AppleCare+ deductible: $99 CAD
How to book:
- Visit apple.com/support/locations (select Canada)
- Or call 1-800-MY-APPLE
Turnaround: Same-day service at larger locations; 2–5 days at smaller ones.
Best if: You want official parts and warranty coverage. AppleCare+ is worth it if you’re accident-prone.
Authorized Apple Repair Partners
Apple’s licensed repair shops (like Best Buy, regional tech stores) offer faster service and sometimes lower prices.
Cost: Same as Apple (~$99–$349 CAD depending on coverage)
How to find one:
- Apple’s official locator: apple.com/support/locations
Third-Party Repair Shops
Local independent shops often fix cameras faster and cheaper than Apple.
Cost: $80–$250 CAD (varies widely)
Pros: Fast, often cheaper, may use compatible parts
Cons: Quality varies, may void remaining warranty, no official warranty on the repair
Red flags: Prices too good to be true (<$50), no warranty offered, no reviews
DIY Repair Option (When, When Not To)
Best case: Scratch lens glass only. You can buy the glass replacement (~$30–$60) and install it yourself with iFixit guides and a $50 tool kit.
Worst case: OIS failure or sensor damage. Don’t touch this—risk of secondary damage is very high.
Skill level needed: Medium (requires disassembly). Not recommended unless you’ve repaired phones before.
Links:
- iFixit has model-specific camera replacement guides (ifixit.com)
- Parts available on Amazon, eBay, iFixit Parts store
Conclusion
A blurry iPhone camera is almost always fixable in minutes either by you (cleaning, restarting, tapping to focus) or by a repair shop. Start with the five quick fixes at the top. If none work, diagnose which of the eight root causes matches your situation. Most hardware repairs run $100–$400 CAD in Canada and take 1–5 days. For urgent issues or warranty questions, contact Apple Support at apple.com/support/locations.
FAQs
Why is my iPhone camera blurry after an iOS update?
Apple occasionally releases updates with camera bugs. Try restarting your phone, updating again, or resetting all settings. If blur persists, it’s likely a hardware issue unrelated to the update.
Can I fix a scratched camera lens myself?
Small scratches might not affect much. Deeper scratches need lens glass replacement (~$100–$150 CAD at a repair shop). DIY replacement is possible with iFixit guides but requires care.
Does AppleCare+ cover a blurry camera?
Yes, if it’s accidental damage. If it’s a manufacturing defect (your phone is under 1 year old), it’s covered under standard warranty. If it’s water damage, you’ll pay the $99 CAD deductible.
How do I know if it’s the lens or the sensor that’s damaged?
If only one camera is blurry (like telephoto but main is sharp), it’s likely that specific camera module. If all cameras are blurry, it’s software or hardware deeper inside. Visit a repair shop for diagnosis.
Why is my camera blurry only in third-party apps like Snapchat?
Third-party apps capture at lower resolution or compress video to save data. This isn’t a broken camera. Take photos in the native Camera app, then share them to Snapchat for better quality.
Can condensation damage be reversed?
If caught early (condensation only, no liquid damage), yes. Turn off the phone and leave it in a warm, dry place for 24–48 hours. If you see actual water droplets inside, or if liquid got into the phone, professional service is needed.
How much does Apple charge for camera repair in Canada?
Without AppleCare+: $199–$349 CAD depending on your model. With AppleCare+: $99 CAD deductible. Check apple.com/support for exact pricing for your model.
Should I repair or replace my iPhone?
If your camera repair costs less than 30% of a new phone’s price, repair is usually better. For an iPhone 12, camera repair (~$250) vs. a new phone ($1200+) = repair wins. For an iPhone with other problems (cracked screen, battery, more), replacement might make sense.
